
Get started:
You will find a step-by-step instruction below.
Step-by-step instructions
We usually recommend starting with a small group of users, for example the office team. This way you can gain experience, decide on which pinboards you want and get everyone on board quickly.
How to create a user:
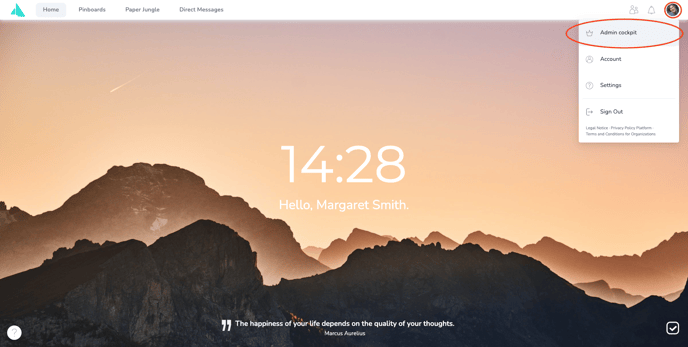
Navigate to the Admin Cockpit
Click on your avatar in the top right corner and select "Admin Cockpit".
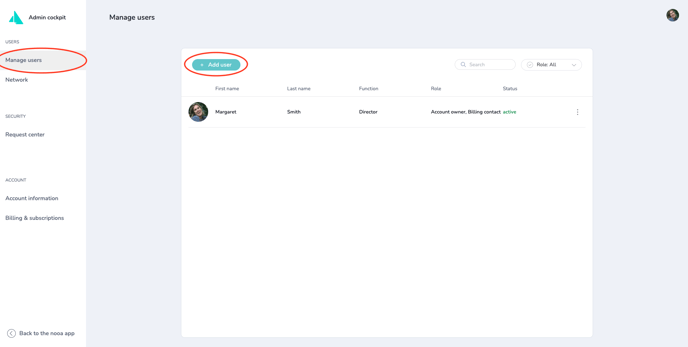
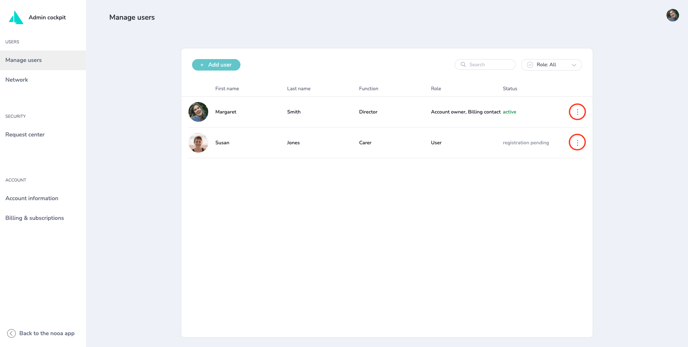
Add a new user
In the Admin Cockpit you can see your users of the nooa platform in the menu item "User administration". You can also see your own user account here. To create a user, click on "Add user".
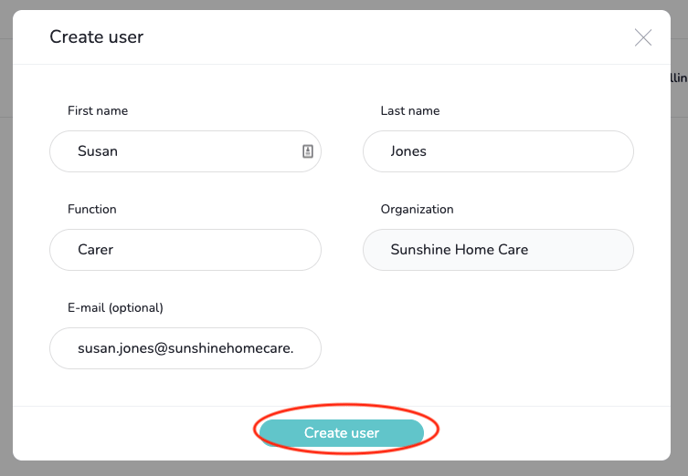
Complete the user details
Enter the first name, last name and function of the user. Optionally, you can also add the user's email address. This will allow the user to reset their passwords themselves later, for example. Click on "Create user".
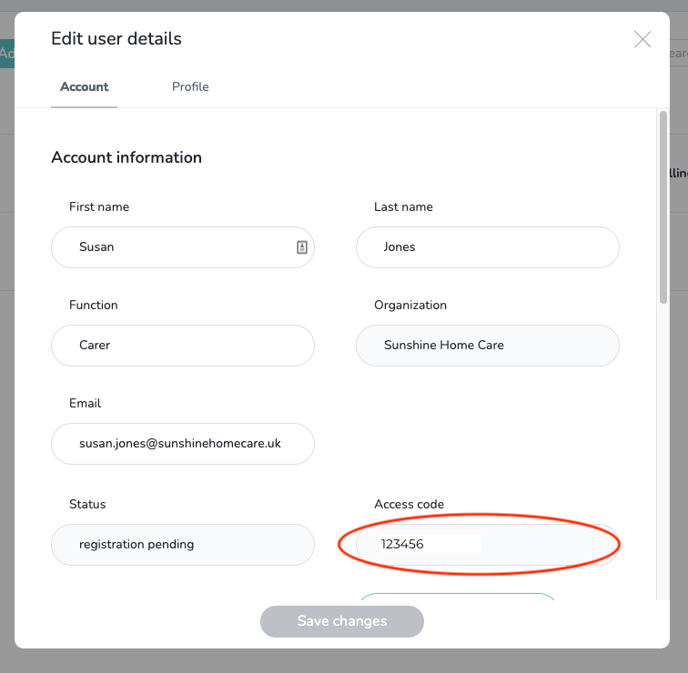
Share the access code with the user
An access code is generated automatically. Share the code with the user e.g. verbally in the user's presence, by e-mail or any other suitable means.
The access code is valid for 24 hours for security reasons. After that, you can create a new one.
View your new user
You did it! You have successfully created the user. The user now appears in the status "Registration pending". As soon as the user has activated her user account via the access code, the status changes to "active".
Click on the three vertical dots behind the status of the user and select "Edit user". Now you are back in the user details view and can make changes here.